Archive for the 'Recipes' Category

14
Oct
12

Mochi Whole Wheat Flower Buns w/Cinnamon Cherry Filling (Steam Baked)

[Equipment: convection oven with water tray for steam baking, baking tray with silicone mat. For more information about the terminology in this recipe, see Low Temperature Baking: A Journey of 3 Paths.]

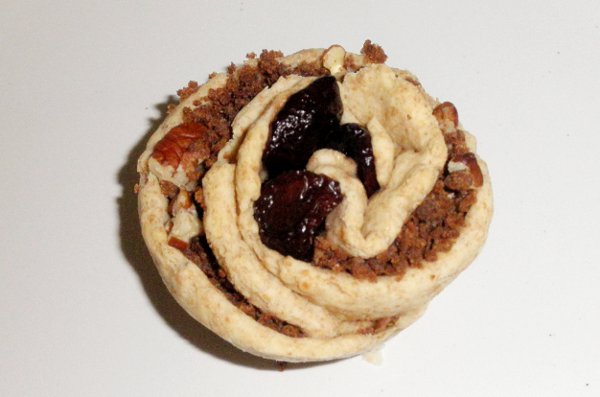
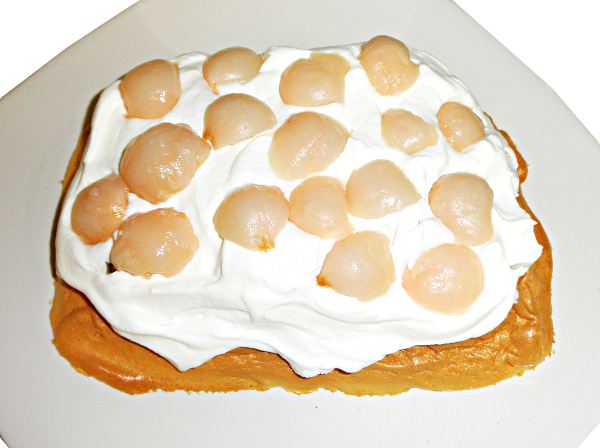
Steam baking and mochi flour keep these low-fat brioche buns moist without lots of oil or butter. Because there is so little butter, it is rubbed into the flour for even distribution. For a chewy texture, I use pizza crust yeast, which contains dough relaxing enzymes. Regular rapid-rise yeast should substitute nicely, with a higher rise and lower density texture. The filling is low-fat too, a mixture of mashed potato flakes and brown sugar. To form the flower shape, I divide the dough into 6 portions, shape each one into a rectangular strip, fill and fold and then roll up and bake.

Makes 6 buns
– 200 calories per bun
– Oven Temperature: effective 250°F/121°C (steam baking)

Cherry Cinnamon Filling:

  • 12 cherries, halved and pitted
  • 1/2 cup mashed potato flakes
  • 1/4 cup brown sugar
  • 1 tablespoon cinnamon
  • 3/8 cup milk
  • 1/4 teaspoon allspice
  • 2 teaspoons butter, softened

Mochi Brioche Dough:

  • 3/4 cup whole wheat flour
  • 1/2 cup mochi flour or glutinous rice flour
  • 1-1/2 teaspoons pizza crust yeast or rapid rise yeast
  • pinch of salt
  • 1/8 cup sugar
  • 1 egg yolk
  • 2 teaspoons butter
  • 1/4 to 1/2 cup warm milk (130°F/54.4°C)

Dried Cherries Method:

1. Slice cherries in half and discard pits. Place cherries on baking mat, juicy side up.

2. Dehydrate cherries at 150F/C until the top surface is dry but the cherries are still pliable. Set aside.

Cinnamon Filling Method:

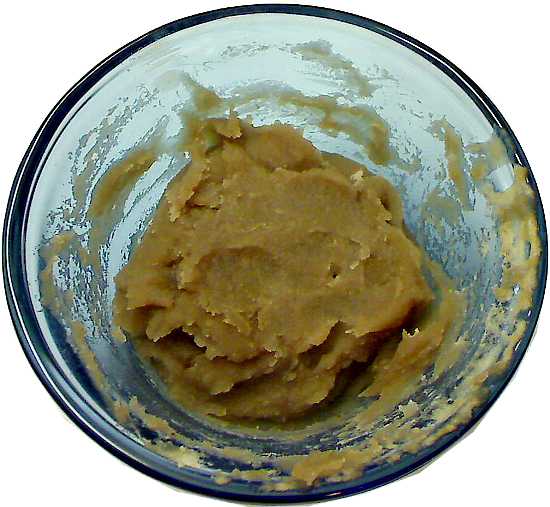
1. In a medium bowl, whisk the mashed potato flakes, brown sugar and spices until combined.

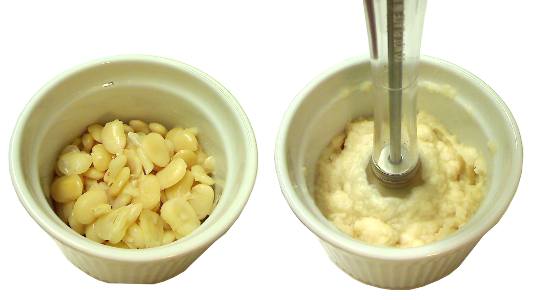
2. In a small bowl, mix the milk and egg yolk. With a fork, stir in the liquid until all ingredients are moistened. Continue stirring to break up mixture into a sandy, granular texture

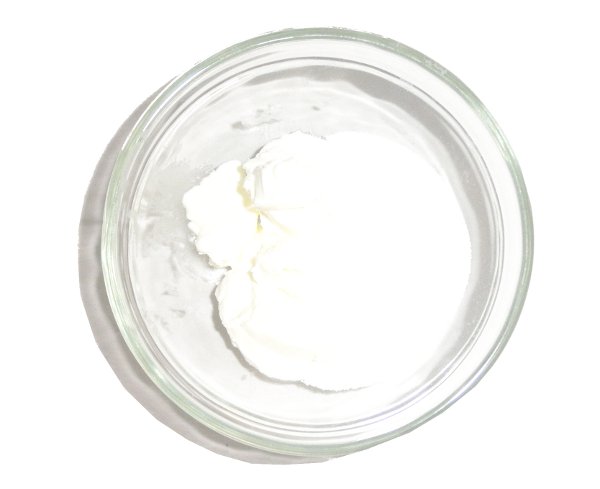
3. Mix in softened butter, keeping mixture light and granular. Cover and set aside.

Buns Method:

1. In a large bowl, mix all the dry ingredients except the yeast.

2. Dice butter and add to flour. Rub butter with hands or cut butter with a pastry cutter until the mixture has a lightly sandy consistency.

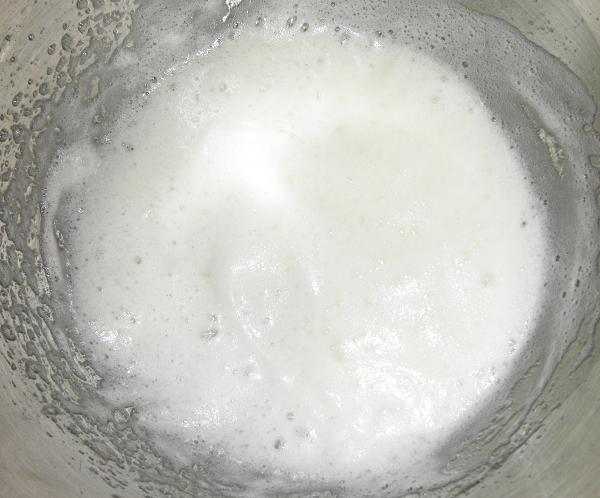
3. In a small bowl, whisk together the milk and egg yolk.


4. Drizzle the milk over the flour. With a fork, stir the liquid into the flour until it forms a dough that holds its shape when squeezed.

5. Knead the dough for about 4 minutes until the surface is smooth.

6. Allow to rise in a proofing box or other warm place until double in bulk.

7. Gently deflate the dough and divide into 6 portions.

8. Roll each portion into a rectangle about 7-1/2 x 2 inches.

9. Fill only the top half of the rectangle. Place 4 dried cherry halves at one end. Spread about 2 tablespoons of the cinnamon filling along the remainder. Sprinkle 1 teaspoon of chopped nuts over the filling.


10. Beginning at the end with the cherries, fold the dough up to cover the filling. Then roll it into a standing spiral with the open end facing up. Pinch the end into the bun to seal.

11. Place each bun in a greased muffin cup. Cover and let rise in a proofing box or other warm place for about 30 to 40 minutes or until rolls have blossomed over the cups.

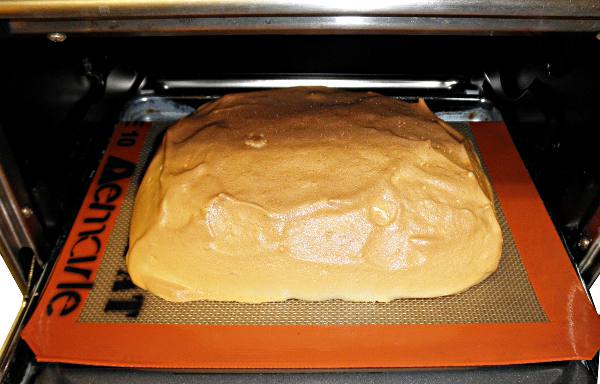
12. Prepare the convection oven for steam baking with an open water tray. Preheat the oven to an effective temperature of 250°F/121°C (my oven dial was set to 300°F/150°C and the effective temperature checked with a thermometer). Place a trivet in the tray to hold the muffin tin above the water line. Steam bake for about 30 minutes or the rolls are lightly golden.


13. Serve hot or warm.

15
Sep
12

Puff Pastry Rugelach w/Ginger Chocolate Fruit Filling (Baked)


At one time I was a paralegal at a large law firm in New York City. I worked every night (7 days a week) past midnight. For dinner, I and my crew would order from Carnegie Deli, and I almost always asked for rugelach for dessert. This version of rugelach simulates a cream cheese pastry dough with standard puff pastry as the base. I could have used the low-temperature puff pastry dough, but this recipe is the first of several LTB experiments with standard puff pastry (Pepperidge Farm brand), purchased at my local market.


In this first trials, I made rugelach like mini crescent rolls. The dough, cut into triangles and spread with a layer of a cream cheese paste and dried fruit and nuts, was rolled up and baked at 250°F/121°C. As seen in the pictures above, the rolls puffed up nicely. However, when cut open, the dough in the inner part of the roll and on the bottom did not puff as much and imparted a hard texture to the pastries.

For the final version, I rolled the puff pastry into a single-layer log, because a single layer bakes faster and more thoroughly. The cream cheese paste was reformulated to be drier, as the wetter paste made the interior soggy. I conclude that for this kind of pastry, the low-temperature puff dough or a cream cheese tart dough would produce a result closer to the traditional rugelach. On the other hand, if these were baked at the package-recommended temperature of 350°F/177°C, these log-style or the crescent rugelach would be very crisp, flaky and spectacular puffs.

Makes 12 rugelach
– 60 calories per rugelach
– Oven Temperature: 250°F/121°C

Pastry:

  • 3 rectangles prepared puff pastry (2 x 4-1/2 x 1/8 inches – see text)
  • 1 egg, beaten

Chocolate Cream Cheese Filling

  • 2 tablespoons cream cheese
  • 2 tablespoons sugar
  • 2 teaspoons cocoa powder
  • 1/4 teaspoon powdered ginger
  • 1 tablespoon whole wheat flour

Fruit-Nut Filling

  • 1/8 cup dried cherries, chopped
  • 1/8 cup raisins, chopped
  • 1 tablespoon chopped nuts

Ginger Sugar

  • 1 teaspoon sugar
  • 1/4 teaspoon powdered ginger

Filling Methods:

1. To make chocolate cream cheese filling: in a small dish, mix the cream cheese and sugar.

2. Add cocoa and ginger and mix until well combined. Set aside.

3. Mix in flour to form a thick paste.

4. To make fruit-nut mix filling, in a small dish, mix the chopped raisins, dried cherries and chopped nuts.

Rugelach Method:

1. For each pastry, cut a sheet of 1/8-inch thick puff pastry dough 2 x 4-1/2 inches.

2. Spread a thin layer of chocolate cream cheese over the surface.

3. Sprinkle about 1-1/2 tablespoons of the fruit-nut mix over the top half of the dough only.

4. Fold the dough up and seal the edges to form a log.

5. Cut the log into 3 pieces and place on baking mat.

6. In a small dish, combine 1 teaspoon sugar and 1/4 teaspoon powdered ginger.

7. Lightly brush the surface of the rugelach with beaten egg or apricot/peach jam and sprinkle with the ginger sugar.

8. Bake rugelach for 50 minutes until golden. They will crisp up as they cool.


07
Sep
12

Walnut and Valerian Biscotti (Baked)

[Equipment: convection oven for slow baking, baking tray with silicone mat. For more information about the terminology in this recipe, see Low Temperature Baking: A Journey of 3 Paths.]

Note: This cookie contains a medicinal ingredient: valerian root. Please research any concerns about the ingredient before making this recipe.

These relaxing cookies get their mild but noticeable tranquilizing effect from homemade valerian root oil. Valerian has a bitter taste, so I played with the bitterness by adding complementary flavors of brown sugar, walnuts and coffee. Baking soda offsets some of the acidity, for a cookie that tastes very smooth. The sedating effect is truly mild for me, and I could eat them all day. However, anyone not familiar with valerian root should consume them cautiously.

My local market sells solid valerian root, which is very hard – like wood – and cannot be cut with a knife. For the oil infusion, I snipped off small chunks of it with a set of wire cutters, the kind sold in hardware stores. The same amount (2 grams) of powdered valerian root could be infused more easily, and could be added to the cookie dough after infusion with the risk of more bitter cookie. Choose a bland oil (I had canola) to avoid any off flavors. The infusion time should be at least 24 hours at 115°F/46.1°C.

The infusion could be heated in an oven, a dehydrator, on an insulated incense burner, even in a box heated with an incandescent bulb, but keep the temperature no higher to preserve the efficacy of the valerian essences.

Makes 10 cookies
– 117 calories per cookie
– Oven Temperature: 250°F/121°C

Biscotti:

  • 1 cup all-purpose flour
  • 1/2 teaspoon baking powder
  • 1/4 teaspoon baking soda
  • 1/8 teaspoon salt
  • 1/2 teaspoon vanilla extract
  • 1 large egg
  • 1 tablespoon valerian oil (see text and see below)
  • 1 tablespoon water
  • 1/4 cup brown sugar
  • 4 packets sucralose (equal to about 3 tablespoons sugar)
  • 1/2 teaspoon instant coffee
  • 1/2 cup chopped walnuts (or other nuts)

Valerian Oil:

  • 2 grams valerian root or valerian powder
  • 1-1/2 tablespoons vegetable oil

Valerian Oil Method:


1. If using valerian root, weigh out 2 grams. With mini clippers, break up the root by snipping off small chunks. If using valerian powder, measure out 2 grams of powder.

2. In a small heatproof dish, mix the root pieces with the vegetable oil. Cover the dish with heat-resistant plastic wrap.

3. Heat the oil over an insulated incense burner or put the dish in a low oven for at least 24 hours. In either case, the temperature of the oil should rise no higher than 115°F/46°C. Check it occasionally with a thermometer. Use immediately or store until ready to use.

Biscotti Method:

1. In a medium bowl, whisk the flour, salt, baking soda, baking powder until well combined.

2. In a small bowl, mix the egg, brown sugar, sucralose, valerian oil, vanilla and water until the brown sugar has completely dissolved.

3. Add wet ingredients to the dry ingredients and mix to form a stiff dough.

4. Add walnuts and knead into the dough.

5. Transfer the dough to a baking mat. Shape into flat log about 9.5 x 3 inches.

6. Bake at 250°F/121°C for 30-35 minutes until lightly golden.

7. With a serrated knife, cut the log on a diagonal into 1-inch cookies. Place the cookies on the baking mat, one cut side facing up. Bake for 10 to 15 minutes. Turn cookies over so that other cut side faces up. Bake for another 15 minutes.

8. Let cool and serve or store in an airtight container.

08
Aug
12

Maple-Sugar Yam and Chicken Pizza (Steam Baked)

The difficulty with pizza is that the cheese topping dries out if dry baked at low temperature for long periods. That’s why I was so excited about steam baking a pizza, because the superheated moisture would keep the cheese moist long enough to melt, while the crust browned. As the above picture shows, the recipe was a success. The cheese had a lovely drippy quality, fresh from the oven.

This recipe was also a test of a new yeast: Fleischmann’s Pizza Crust Yeast, a rapid-rise yeast with dough-relaxing enzymes, for a lower-rise, dense but chewy, crust. I liked it very much, for very easy to make dough with just 4 minutes of hand-kneading. Fleischmann warned against using Pizza Crust Yeast in other bread recipes. but I’ve seen excellent results in other kinds of breads. This product should be great with soft pretzels too. Substitute regular rapid-rise yeast, if not available locally.

The maple sugar yams were yam slices, steamed and then marinated in a bit of maple syrup. Likewise, the chicken was steam cooked, shredded and marinated in soy sauce. For both, I would marinate for at least an hour. For tomato sauce, I had a jar of Prego mushroom pasta sauce in the fridge.

Makes 6 servings
– 125 calories per serving
– Oven Temperature: effective 250°F/121°C (steam baking)

  • 1 cup all purpose flour
  • 1/4 teaspoon salt
  • 1/2 teaspoon sugar
  • 2 teaspoons vegetable oil
  • 1/3+ cup warm water
  • 1 teaspoon pizza yeast or rapid rise yeast (see text)
  • 1/4 cup sliced cooked broccoli
  • 1/4 cup sliced maple sugar yams (see text)
  • 1/4 cup soy-marinated, cooked chicken pieces (see text)
  • 3/8 cup tomato sauce (see text)
  • 3/8 cup shredded mozzarella cheese
  • 1/4 teaspoon Menudo spices

Dough Method:

1. In a large bowl, mix the flour, salt, sugar, yeast until evenly distributed.

2. Mix in 1/3 cup warm water and 1-1/2 teaspoons vegetable oil to form a moist pebbly dough (add more water, by the teaspoon, if necessary).

3. Knead dough for 4 minutes until smooth.

4. If using fast rise yeast, cover and allow to rise until double in volume, about 30 minutes to 1 hour.

Pizza Method:

1. Flatten dough into an 8-inch disk and set inside a greased 8-inch cake pan.

2. Spread the tomato sauce over the top of the dough.

3. Arrange yams, broccoli and chicken on the pizza.

4. Top with the mozzarella cheese. Drizzle 1/2 teaspoon vegetable oil over the cheese and toppings.

5. Prepare oven for steam baking. Fill the water tray with boiling water, enough for at least 40 minutes of baking (about 1/4″ deep in my tray). Do not cover the tray. Heat oven to 300°F/149°C (effective temperature of 250°F/121°C with the water tray uncovered, checked with a thermometer). Put the pan on a trivet, so that it doesn’t touch water.

6. Bake for 40 minutes, until the crust is golden and sounds hollow when tapped, and the cheese has melted.


22
Jul
12

Citrus-Lychee Pavlova with Mango Sauce (Wet-Dry Baked)

[ Equipment: Steam oven or convection oven water tray for wet-dry steam baking, baking sheet with silicone baking mat. For more information about the terminology in this recipe, see Low Temperature Baking: A Journey of 3 Paths ].

This is my second Pavlova cake. In addition to a different combination of fruits and sauces, it comes with a slightly different recipe for the meringue. The first one (a ginger-blueberry-banana pavlova) was baked in a dry oven. The batter spread out during baking and did not have quite the classic marshmallow texture. The wet-dry steam technique addresses both problems. A wet-dry steam oven steams for a fraction of the baking time only; then it switches to dry heat. The wet phase transfers heat quickly to the food to raise its temperature and set the batter or dough. The dry heat phase crisps the food.

I had reservations about the texture of meringue in the last pavlova. In testing the wet-dry technique, I mixed up a pavlova batter with a higher cornstarch-to-egg-white ratio (identical to other standard recipes), cornstarch being the ingredient that transforms the meringue into a marshmallow-like consistency. The result was excellent on the very first try. The all-sugar batter only spread a little before setting. It had a lovely crackly top crust that began to sink within seconds of being taken out of the oven.

However, the cake shown in these pictures contains the sugar-sucralose blend. For the crispest crust, I recommend making the meringue with sugar only. The sucralose-sugar blend cake has a softer crust and fewer calories, but also more height and does not sink very much. Do not omit the lemon juice; it really perks up the flavor of the lychees, and canned lychees benefit most from the soaking. An assortment of juices could substitute for the mango nectar. A thinner juice may need more cornstarch to thicken.

Makes 6 servings
– 120 calories per serving
– Oven Temperature: Wet-Dry Steam-Baked effective 250°F/121°C

  • 3 large egg whites (room temperature)
  • pinch of salt
  • 1 teaspoon lemon juice
  • 1 teaspoon orange extract
  • 1/2 cup sugar (or 1/4 cup sugar + 8 packets sucralose – see text)
  • 1 tablespoon cornstarch
  • 1 10oz can of mango nectar
  • 2 teaspoons cornstarch
  • 2 tablespoons water
  • 7 or 8 fresh or canned whole lychees, peeled and pitted
  • 1 tablespoon lemon juice
  • 4 oz. of prepared whipped topping
  • 1/4 teaspoon lemon extract

Mango Sauce Method:

1. In a small dish, mix the cornstarch and cold water.

2. In a small saucepot, heat the mango nectar until it simmers, stirring constantly. Whisk in the cornstarch slurry until the sauce thickens. Remove from heat and let cool.

Meringue Cake Method:

1. Drain lychees. In a small bowl, mix lychees and lemon juice. Cover and let macerate in the refrigerator for at least 1 hour.

2. In a large bowl, beat the egg whites, lemon juice and salt until frothy.

3. Sprinkle in the sugar in 2 portions and beat to the stiff peak stage. Beat in the orange extract. Sift the cornstarch over the batter and fold in.

4. Spoon batter onto a silicone baking mat sitting on a baking sheet. Shape into a 6 x 4 inch block.

5. Prepare oven for wet-dry steam baking. For a convection oven, fill the water tray with about 1/8 inch water (or the equivalent amount to steam bake for about 30 minutes). Set a trivet in the center to hold the baking sheet above the water line. Preheat the oven to 300F/148C to get an effective 250F/121C steaming temperature (check with a thermometer).

6. Place baking sheet on trivet and bake meringue for 30 minutes.

7. Siphon off any remaining water in the water tray (or allow to steam off if nearly evaporated). Turn dial down to 250°F/121°C for dry baking. Continue baking for another 40 to 60 minutes. Surface of crust should be dry and golden brown.

Note: If using the sugar-sucralose blend, the crust may not crisp.


7. Let cool and transfer to a serving plate.

8. In a medium bowl, combine the whipped topping and lemon extract.

9. Spread the lemon whipped topping over the top of the meringue cake. Drain and cut the lychee fruits in half. Place the lychees into the whipped topping.

10. Drizzle mango sauce over the lychees and whipped topping. Sprinkle top of pavlova with craisins.


10
Jul
12

Cactus Hominy Polenta Cake

[ Equipment: steam oven, steamer or low-temperature-capable convection oven, an 6-inch (2-cup) round cake pan. For more information about the terminology in this recipe, see Low Temperature Baking: A Journey of 3 Paths. ]

This steamed cake is a savory companion to the Maple Polenta Cake with Chamomile Hominy. The batter mixes cornmeal and rice flour for a softer polenta than from cornmeal alone. The tomato bullion contains chicken bullion with dried tomato essence, and regular chicken bullion with a spoon or two of tomato sauce should substitute fine. My local market sold jars of prickly pear cactus nopalitos, cooked and cut into strips. They have a light vinegary flavor and a mucilaginous texture, a great match for the soft polenta. If cactus isn’t available, substitute chopped string beans.

Makes 4 servings
– 105 calories per serving
– Oven Temperature: effective 250°F/121°C steam baked

  • 1-1/2 cups water
  • 1-1/2 tablespoons tomato bullion powder
  • 3 tablespoons plain tomato sauce
  • 1/2 cup cornmeal
  • 2 tablespoons glutinous rice flour
  • 1 cup prepared (canned) hominy
  • 1/3 cup chopped cactus nopalitos (cooked cactus strips)

1. In a small bowl, whisk cornmeal and rice flour until evenly combined.

2. In a saucepan, heat water, bullion and tomato sauce until simmering.

3. Whisk in cornmeal-flour and continue whisking until mixture has thickened and coming away from sides of saucepan.

4. Mix in hominy.

5. Mix in chopped cactus.

6. Pour into greased 6-inch pan or 2-cup baking dish. The polenta cake can be steamed or steam baked. For steam baking, leave the water tray uncovered and place a trivet or stand to hold the dish above the water line. Steam bake at 250°F/121°C for 70 minutes.

7. Cool. Slice and serve.


29
Jun
12

Purple Rice Zong Zi Wrapped Dumplings w/Apple-Guava Filling (Steamed)

[ Equipment: steamer. For more information about the terminology in this recipe, see Low Temperature Baking: A Journey of 3 Paths ].

The Dragon Boat Festival officially took place on June 23 this year. To celebrate, I made zongzi (粽子) steamed wrapped dumplings with “forbidden rice”, also called purple rice. I was shocked to find it in my local market which does not stock plain glutinous rice. A tiny bag of purple rice cost me almost $7. I learned that purple rice zongzi, relatively new in restaurants, command premium prices too.

Typically, purple rice zongzi contain a sweet filling, although savory fillings can complement the nutty flavor of the rice just as nicely. A sweet filling could be red bean paste or a yam paste. I had a can of guava paste in my food bin, so that became the central flavor for my filling. Guava paste has a strong flavor and lots of sugar, so I cut the sweetness with applesauce and mixed the fruit into a lima bean paste. As an alternative, the recipe does include a savory sausage filling.

I recommend steaming these dumplings only. Do not boil them because they will lose their color in the water. At the time of this writing, there were no other purple rice zongzi recipes online. As I did in my earlier white rice zongzi recipe, I wrapped the dumplings in corn husks, which are available locally.

Makes 4 dumplings
– 165 calories per dumpling
– Oven Temperature: steamed

Dumplings:

  • 1/2 cup raw purple rice
  • 4 portions filling (sausages, apple-guava paste, etc. – see text, see below)

Apple-Guava Filling:

  • 1/4 cup lima bean puree
  • 1-1/2 tablespoons guava paste
  • 1-1/2 tablespoons unsweetened applesauce

Apple-Guava Filling Method

1. Soak beans for 4 hours or overnight. Drain. Put beans in a saucepot and cover with water. Simmer until tender, about 30 to 45 minutes. Put beans in a small bowl and puree to a smooth paste with an immersion blender (or do this in a food processor or blender).

2. Measure out 1/4 cup of the bean puree. Mix in applesauce and guava paste with a fork. Then puree the mixture to a smooth paste with an immersion blender or food processor.

3. Transfer to a heatproof cup. Heat the paste in the microwave for 10 to 15 seconds. Remove and stir the paste to cool and allow moisture to evaporate. Replace in the microwave and repeat this procedure until the paste darkens and thickens and an inserted spoon will remain standing in the paste (about 3 to 4 minutes). Mixture will have reduced down to about 2 to 3 tablespoons.

4. Cool. Store covered in a refrigerator until ready to use.

Dumpling Method:

1. Rinse and soak rice overnight or for about 6 hours. The rice grains will split open and double in volume. Pour out some of the soaking water, but leave enough to cover the rice.

2. Bring steamer water to a medium boil. Steam rice in a wide-bottom bowl for 40 minutes.

3. Prepare the fillings. In the picture above,  the bowl on the left has the apple-guava paste. The bowl on the right contains a


4. Lay flat a corn husk. Spread 2 heaping tablespoons of rice on the leaf into an area about 3-1/2 x 2 inches. Lay a piece of sausage over the rice or shape about 2 tablespoons of guava paste into a sausage and lay over the rice.

5. Cover with 2 tablespoons more of rice.

6. Wrap the husk closed, fold and tie with kitchen twine to secure. Steam the zongzi for 1 hour 30 minutes.

7. Cool. Unwrap and serve. The picture above shows a purple rice zong-zi with sausage filling. In the picture below, the filling is apple-guava paste. I like to serve the apple-guava paste dumpling with a drizzle of honey or agave syrup.

27
Jun
12

Lemon-Chamomile Angel Food Loaf Cake (Wet-Dry Steam Baked)

[ Equipment: Steam oven or convection oven with water tray for wet-dry steam baking, 8 x 4 x 4 inch loaf pan. For more information about the terminology in this recipe, see Low Temperature Baking: A Journey of 3 Paths ].

This angel food cake has a firmer texture than a standard angel food cake and is shaped in a loaf pan. It’s my first recipe baked with a wet-dry steam method. Steam quickly heats the batter, and then dry heat finishes the cake and crisps the surface. The chamomile and lemon flavoring reminds me of a soothing herbal tea.

I didn’t have a chamomile extract, so I made my own chamomile oil infusion, heating it on top of a ceramic incense burner. There were no instructions for making chamomile oil, so I let it infuse for about a day on low heat, switching out tealight candles (beeswax) as they burned down. I recommend a bland vegetable oil, such as canola oil, to get the best chamomile flavor. Check the temperature of the infusion periodically. It should be no higher than 110-120°F/43-49°C (same as the raw food dehydration guideline) to preserve the flavors and essential compounds in the flowers.

Makes 5 servings
– 162 calories per serving
– Oven Temperature: Wet-Dry Steam-Baked effective 250°F/121°C

Angel Food Cake:

  • 4 egg whites
  • 2 teaspoon lemon extract
  • 1 tablespoon lemon juice
  • 5 tablespoons flour
  • pinch salt
  • 3/4 cup sugar (or low-calorie sweetener blend, see text)
  • 2 teaspoons chamomile oil (see text, see below)

Chamomile Oil:

  • 2 tablespoons vegetable oil
  • 1 tablespoon dried chamomile flowers

Chamomile Extract Method:

1. In a small, heatproof dish, mix oil and chamomile flowers. Heat chamomile mixture over a very low flame for about 24 hours. Shown here is a ceramic oil diffuser as the heat source. Check the temperature of the oil periodically. If it’s above the 110-120°F/43-49°C range, place a disk of aluminum foil between the dish and the heater to dissipate excess heat.

2. Cool. Cover and set aside.

Angel Food Cake Method:

1. Line bottom and long sides of 8 x 4 x 4 inch loaf pan with a single strip aluminum foil to make a sling. Do NOT grease pan.

2. In a medium bowl, whip egg whites, lemon juice, lemon extract, salt until frothy.

3. Sprinkle in sugar and whip to stiff peak stage.

4. Sift flour over batter and fold in.

5. In a small dish, mix 3 tablespoons of the egg white batter and the chamomile oil using a fork. Pour the oil mixture back into the egg white batter and fold in.

6. Spoon batter into lined loaf pan and gently smooth the surface flat.


7. Fill water tray for steaming baking with about 1/8-inch water. The water must completely evaporate after about 30 to 40 minutes of baking. Preheat oven to effective to 300°F/148°C (for an effective temperature of 250°F/121°C with the steam – checked with an oven thermometer).

Place pan on trivet so that it does not touch the water. Bake for about 35 to 40 minutes. Top crust should be lightly golden but sticky. Check water level. All the water in the tray should have evaporated. If not, drain or siphon off the remainder.

Continue baking for another 20 minutes until the crust is crispy and dry and a toothpick inserted in the center comes out clean.

8. Invert the pan over a heatproof bowl and allow the cake to cool.

9. With a small knife, loosen the cake from the short sides of the pan and lift out by pulling out the ends of the foil sling. Carefully peel off the foil.

10. Slice and serve with a drizzle of honey or maple syrup.


20
Jun
12

Boston Brown Bread w/Bourbon Baked Beans (Steam Baked)

[ Equipment: Steamer or convection oven with water tray, 8 x 4 x 4 inch loaf pan. For more information about the terminology in this recipe, see Low Temperature Baking: A Journey of 3 Paths ].

Two years ago, I posted a recipe for a Cranberry Indian Pudding to honor Independence Day. For this year’s holiday, I decided to go with another colonial favorite: Boston Brown Bread. Boston Brown Bread was the first recipe I ever published. It was in a school journal, back in the 7th grade. This recipe has fewer ingredients than that one, but one key ingredient affects taste and texture: Bourbon-flavored baked beans. A portion of the baked beans are pureed into the batter, and another portion is folded into the batter as a separate ingredient.

There are lots of recipes online for Bourbon Baked Beans. I got mine from a can: Bush’s Grillin Beans with bourbon and brown sugar. The Bush’s beans have a mild taste of bourbon and brown sugar. The flavor of liquor may be the reason, and then only homemade can be pungently bourbon. If the beans are too saucy, drain them or they will add too much liquid to the batter.

I steam baked the bread. The water tray was uncovered and the oven temperature dialed to 275°F/135°C, so that the EFFECTIVE temperature (checked with an oven thermomeeter) was slightly under 250°F/121°C. The bread can be baked the old fashioned way too: steamed in a regular steamer too. If baking in a traditional coffee can, it should have a capacity of 3 to 4 cups. Secure the foil covering to the can by wrapping string around it.

Makes 8 servings
– 132 calories per serving (1060 calories per loaf)
– Oven Temperature: effective 250°F/121°C steam baking (see text)

  • 1 cup bourbon baked beans (see text)
  • 3 tablespoons molasses
  • 1 cup whole wheat flour
  • 1/2 cup cornmeal
  • 1 teaspoon baking soda
  • 1/2 teaspoon salt
  • 3/4 cup milk


1. In the small bowl of a food processor, puree 1/2 cup of bourbon-flavored baked beans and molasses. Mix in milk and set aside.

2. In a medium bowl, whisk together the whole wheat flour, cornmeal, baking soda and salt until combined.

3. Add molasses-bean puree and stir until combined.

4. Fold in (do not mash) 1/2 cup bourbon baked beans.

5. Pour batter into a greased 8 x 4 x 4 inch loaf pan.

6. Prepare the oven for steam baking with an uncovered water tray. Cover the pan with aluminum foil and seal by crimping along the edges. Steam bake for 2 hours.

7. Cool in pan and unmold.

13
Jun
12

Banana Fudge And Berry Tart (Dehydrated)

[ Equipment: dehydrator or oven, 9-inch pie pan (7-1/2 inch diameter bottom). For more information about the terminology in this recipe, see Low Temperature Baking: A Journey of 3 Paths ].

This recipe began as an idea for a dehydrated pie. The crust is a variation on dehydrated peanut butter cookies, one of my earliest warm-air-baked cookies on VaporBaker. For a softer crust, increase the amount of peanut butter or a legume butter, as suggested below. Adding more coconut flour would give a crumblier crust. The banana fudge could be served on its own. I’d shape it in a fancy mold and present it with a drizzle of sweet fruit coulis.

I ground my own oat flour from processing traditional rolled oats. The coconut flour is just unsweetened coconut flakes chopped down in a food processor too. I would not substitute the blueberry craisins, as they play off the chocolate background very nicely without commandeering attention. If the local market doesn’t stock blueberry craisins, a mix of chopped dried sweetened cranberries and dried blueberries could work.

At 210 calories per serving, I think of this tart as an affordable dessert, but it could be even lighter with low-sugar ingredients. The maple syrup could be one of those no-sugar syrups. I’ve tried one (Maple Farms) and it works fine. Granulated sucralose or other granulated sweetener could stand in for the sugar. A legume butter in the pie crust dough would cut the calories of the peanut butter. (I don’t recommend a legume butter in step 1 of the assembly, because the peanut butter is meant to be a waterproof coating for the dried crust.) That’s a total reduction of over 400 calories per tart or 50 calories per serving.

This semi-raw tart can be made 100% raw by replacing the maple syrup with a liquid sweetener like honey. Although the tart can be optionally chilled before serving, it is a true dehydrated pastry that doesn’t need refrigeration. The recipe dehydrates at a higher 150°F/65.6°C temperature, to accelerate the preparation, which may impact flavor slightly. However, this tart has flavor to spare.

Makes 8 servings
– 210 calories per serving
– Oven Temperature: 150°F/65.6°C dehydrator

Tart Crust:

  • 1/2 cup oat flour (coarsely ground – see text)
  • 1/4 cup coconut flour (see text)
  • 2 to 3 tablespoons peanut butter or legume butter (see text)
  • 3 tablespoons maple syrup

Banana Fudge:

  • 1 large banana (8 inches)
  • 1 medium zucchini (5 to 6 oz.)
  • 1/4 cup unsweetened natural cocoa powder
  • 3 tablespoons sugar
  • 2 tablespoons maple syrup
  • 1/4 teaspoon powdered cinnamon
  • 1/2 teaspoon vanilla
  • 1/4 cup blueberry craisins

Assembly:

  • 3 tablespoons peanut butter
  • 3 or 4 dried apricots

Tart Crust Method:

1. In a medium bowl, combine the oat flour and coconut flour.

2. Stir in the maple syrup and 2 tablespoons peanut butter to form a moist, pebbly meal.

3. Press the dough into a greased, 9-inch pie pan, covering just the bottom of the pan.

4. Perforate the dough every 1/2 inch.

5. Dehydrate for about 2 to 3 hours until the dough has pulled away from the sides of the pan. If pushed a little, the entire crust should loosen in one piece. Do NOT unmold the crust. Set aside.

Banana Fudge Method:

1. In the small to medium bowl of a food processor, finely chop 1 zucchini.

2. Add the banana and maple syrup. Process until mixture becomes a whipped puree.

3. Add sugar and cocoa powder and process for about 1 minute.

4. Add vanilla and cinnamon, and process until well combined.

5. Pour mixture into a baking dish and spread out. Dehydrate for 3 to 4 hours until about 1/3 original volume. Every hour, stir the mixture to break any skin formed on the surface.

6. Mix in the blueberry craisins.

Assembly Method:

1. Soften 3 tablespoons of peanut butter in the microwave (about 15 to 20 seconds). Spread a thin layer of peanut butter over the top of the tart crust.

2. Cover the top of the crust evenly with the banana fudge. Spread the fudge with the back of a spoon.

3. Slice the dried apricots into thin slivers and sprinkle over the fudge.

4. If desired, cover and chill the tart for about 30 minutes to an hour before serving.


Notices

Read about: low temperature baking.