
Low temperature baking (LTB) is defined as gentle baking at temperatures below 300°F/150°C to preserve the flavors and nutrients and to avoid poisoning food with heat-forged toxins like acrylamides and heterocyclic amines.1 Of course, it’s important to reduce heat levels in all forms of cooking, but baking, in the words of Michael Ohmert, transforms food “into something not just nutritious but alluring.” Food that nourishes and also entices, in portable and easily stored forms, gets eaten quickly and frequently. LTB transforms food slowly and encompasses 3 basic low-heat methods: slow baking, steaming and dehydration or “warm air baking”. It also includes sous vide baking (hot water bath) and especially steam baking (in ovens flooded superheated steam).

LTB breads, cakes, cookies, rolls, buns present different textures and intense flavors in addition to well-preserved nutrients and their status as living foods due to activated natural enzymes and surviving yeast. (See Horsford, Eben, Report On Vienna Bread, Washington: Gov’t Printing Office, c. 1875, p. 94.) LTB techniques are almost necessity for medicinal baking. Medicinal ingredients (including pharmacological herbs) often lose their efficacies at high temperature. Although many recipes on VaporBaker look indistinguishable from their traditional counterparts, most have been altered either for greater leavening effect or to take advantage of LTB methods and products such as moisture infusion baking, delicate flavorings, heat-sensitive botanicals. Some types of baked goods like popovers really do need high heat to achieve a certain effect. Yet, the pro-LTB attitude here is such that if inflating choux paste with a bicycle pump could successfully puff the eclairs cooking in a dehydrator, I’d have my pump at the ready.

From the very start, VaporBaker has been about experimentation. Many times, a cake might rise poorly or deflate as it cools, a bread may be too dense or the texture a bit coarse, a cookie recipe might take 2 days in a dehydrator to complete, yet if they have other compelling qualities, I will post the recipe. A VaporBaker recipe might make a ridiculous quantity for the amount of work (a whole day to make a single cookie, for instance). Usually, it’s a simple matter to scale the ingredients, but I won’t mathematically scale them unless I’ve actually baked the larger batch.

My first LTB recipes were cooked in a finely adjustable slow cooker, on a stovetop steamer or in homemade dehydrator. These days I mostly bake in a countertop convection oven, doing everything from dehydration to steam-infused baking. However, I am still a HUGE fan of the slow cooker oven (several sections of this article are about baking in a slow cooker). According to Planet Green, slow cookers are 3 times more energy efficient than toaster ovens (never mind the huge wall ovens in homes), AFTER taking into account the longer operating times of a cooker. Solar ovens tap into free energy. Because 99% of recipes bake at 250°F/121°C or less, they are all suitable for solar oven.

Where a recipe suggests dry baking in a convection oven, it can be baked in a regular oven, generally by adding about 10 minutes to the time. The reverse is also true: to convert to convection baking, subtract 10 minutes from a regular slow-baked recipe. The fan in a convection oven assists in slow baking, steam baking and dehydration by eliminating hot spots and humidity gradients. My convection oven has heating elements above and below the rack. During slow baking and steam baking, they can brown food causing less or no acrylamides or other mutagenic or carcinogenic compounds.

1. A Little History Of Low Temperature Baking

Dry baking in pits dug in the earth goes back thousands of year. Although many cultures dry baked breads (around 2500 BCE, the Eygptians were pouring bread dough into graduated molds stacked high like pyramids), baking as an art goes back to the ancient Greeks, who invented the front-loading oven to fit a variety of breads and cakes. (Toussaint-Samat, Maguelonne, A History Of Food, West Sussex, UK: Blackwell Publishing, c. 2009, pp. 201-3.) Slow baking is dry-heat baking at 250-300°F/121-150°C, and ovens set to this range are called slow ovens. As a matter of course, people in ancient times baked in slow ovens when the fuel ran low and the oven cooled, but rarely as a deliberate act. Ancient bakers baked in very hot ovens, close to 480°F/250°C. (Toussaint-Samat, p. 215.)

Thermometers were invented in the 1600s, but oven thermometers were introduced to the public only in the 20th century. The ad above, dated 1903, is for a Kalamazoo stove and range with a new “patented” oven thermometer. Prior to the 20th century, bakers estimated temperature by sticking a bare arm into the heated oven. A slow oven meant being able to hold it there between 45 and 60 seconds. (Mooney, Patrick, Information About Colonial Baking at LoveToKnow.com.)

In early America, an oven could occupy an entire basement or an external structure to the main house. More commonly, a small oven could be recessed into a wall next to the fireplace. They would be fired with wood and coals to very high temperatures, and bake on a schedule as the oven cooled: breads, then pastries, then cakes, then cookies. A slow oven to bake delicate meringues and for dehydrating could take an entire day to cool. (See Colonial Williamsburg Kitchens.) A less complicated alternative for LTB was the Dutch oven (also called a ” bake-kettle”), which could be hung on a hearth or buried in soil, with hot coals underneath and on the lid to get controlled heat from below and above. (Symons, Michael, A History Of Cooks and Cooking, Champaign: Univ. Of Illinois Press, c. 2004, p. 76 and Larkin, Jack, Old Sturbridge Village Cookbook, Guilford: Globe Pequot Press, c. 2009, p. 24.)


Among the early recipes designed for slow baking are François Massialot’s “Dry Meringues”. Massialot was a chef from the later period of the Ancien Regime in France under Louis XIV. In his cookbook The Court And Country Cook (1702), he refers to slow baking as under a “gentle fire” in a “leisurely” oven:
Having caus’d the Whites of four new-laid Eggs to be whipt, as before, till they rise up to a Snow, let four Spoonfuls of very dry Powder-sugar, be put into it, and well temper’d with a Spoon: Then let all be set over a gentle Fire, to be dried a little at two several times, and add some Pistachoes…. Afterwards, they are to be dress’d as the others, and bak’d in the Oven somewhate leisurely, with a little Fire underneath, and more on the top: When they are sufficiently done, and very dry, let they be taken out, and cut with a Knife….
Massialot, François, The Court And Country Cook, c. 1702, p. 103.

In American Cookery (1796), Amelia Simmons alludes to ovens as slow, middling and quick. Her recipe for pound cake in a slow oven implies that “slow” might be a little hot by today’s standards. It calls for 1 pound butter, one pound flour, ten eggs, rose water, spices. “Watch it well, it will bake in a slow oven in 15 minutes.” (Simmons, American Cookery, c. 1796, p. 48.) Colonial cooks didn’t learn with thermometers, but relied on experience to judge oven temperature.
Fire temperatures, colorings, cooking times of an indefinite duration – all these are techniques born of experience…. Boiling a pudding, either savory or sweet, or a piece of meat in a cloth may seem odd…. It was time consuming and laborious to maintain a fire at a specific temperature all the time…. Once the item was placed in a bag and immersed in simmering water, the woman of the house was free to do other things without worrying about her dinner getting charred or overcooked…..
What temperature is a brisk fire? 350? 375? Maybe 450?…. [I]n Simmons’ day temperatures were often gauged by sight and informed guesses based on years of cooking experience.
Haff, Harry, The Founders Of American Cuisine, Jefferson, NC: McFarland & Co. Publishers, c. 2011, p. 29.
Decades later, bakers continued to judge temperature by the senses. A recipe for meringue served with “Russian Cream” in the October 1851 Godey’s Lady’s Book instructed that meringues be “dried” for 3 hours “in a very cool oven”. The 1921 Boston Cooking School Cookbook by Fannie Farmer still used terms like “slow oven” and “moderate oven” in place of numeric oven temperatures.

A new technology from colonial times (but not in use in colonial America) was ideal for LTB: the solar oven. In Switzerland, Horace de Saussure built the first solar oven in 1767 using glass from a carriage window. His oven designs reached temperatures of 189-230°F/87-110°C with multiple layers of glass and wool insulation. Modern solar ovens regularly break 300°F/149°C barrier due to more effective insulation, heat-absorbing finishes and clever reflecting surfaces. Radabaugh, Joseph, Heaven’s Flame: A Guidebook to Solar Cookers, Phoenix, OR: Home Power Pubishing, c. 1998, pp. 1-14.

Steam baking cooks food with superheated (above 212°F/100°C) steam, a technique first seen in bakeries in Vienna. In Europe, in the 1800s, the Viennese were baking in ovens cleaned with wet hay which produced breads and other pastries with glazed, crispy surfaces. The idea of steam baking appeared in France around 1850 in the boulanger August Zang’s invention of ovens with water trays and steam vents to bake bread with a fine glazed crust. They were called Viennese ovens, and the breads and pastries made in these ovens called Viennoiserie. (Chevallier, Jim, August Zang And The French Croissant, c. 2009, pp 3-4.) Although Zang’s ovens likely burned at over 400°F/205°C, they preceded modern steam and combi ovens, which can and do operate in the LTB range.

Techniques for steaming food go back thousands of years, but not all cultures steam cooked bakery style goods. The earliest examples of steamed breads and cakes seem to be found in Chinese culinary history. Around 1600 B.C. in China’s Shang Dynasty, the Chinese began steaming cakes made with flour. Their sweet and savory filled steamed buns, originally created as an offering to the gods, didn’t arrive until the second or third century C.E. (See Chen, Quanfang and Chen, Min, 3,000-Year-Old Food For Thought, China Daily, March 13, 2003; Qiu, Yao Hong, Origins Of Chinese Food Culture, Singapore: Asiapac Books, c. 2002, pp. 99-102.)

English puddings, mixtures of meat or fruit in a batter, boiled or steamed inside animal intestines, were recorded as early as the 13th century. (See Pudding in 1911 Encyclopedia Britannica.) In the 1600s, pudding cloths or bags superseded intestines and opened the door to a new and diverse world of convenient puddings. (Colquhoun, Kate, Taste: The Story of Britain through Its Cooking, London: Bloomsbury Publishing, c. 2007, pp. 122-3.)

Culinary sous vide originally was developed in the 1970s as an industrial technique to keep inexpensive cuts of meat from drying out during long cooking times. It was simultaneously discovered by a chef in France, George Pralus, who was seeking a way to cook a juicier fois gras. Sous vide cooking takes place in a water oven at temperatures between steaming and dehydration. Food, first vacuum packed in a plastic pouch, cooks in an immersion of temperature-stabilized hot water, sometimes for well over a day.
Can sous-vide work for baking? In conventional baking, breads and cakes are done when they reach internal temperatures of 165-205°F/74-96°C, but many conventional bread and cake recipes would not look or taste appealing if made in this modified form of a bain marie. In his book Under Pressure, Thomas Keller says “The sous vide applications for cheese and desserts fall into 3 categories: preparing bases [e.g., custards], compressing fruit and cooking fruits and vegetables.” (Keller, Thomas, Under Pressure: Cooking Sous Vide, New York: Artisan, c. 2008, pp. 14-15, 204.) The cakes or breads in the desserts section of that book are prepared in a regular oven, while some ingredients of the composition are cooked sous vide.

In the recipe pamplet that came with the Sous Vide Supreme (a water oven for home use), chef Richard Blais devised a very soft, almost custard-like, brownie recipe, baked for 90 minutes in ramekins in the Sous Vide Supreme water oven set to 195°F/90°C. The ramekins were not sealed under pressure; it was really a bain-marie. In the video of that recipe, the water oven was set to 184°F/84.4°C for a baking time of only 30 minutes. Why the higher temperature and longer baking time in the printed recipe?

Dehydration in sun and wind as a method of food preservation goes back to prehistoric times. (Toussaint-Samat, A History Of Food, p. 662-3). As a method of food preparation, it appeared in a recipe for “raw” bread, baked in the heat and light of day, in The Essene Gospel of Peace. The Essenes were a 2nd century BCE Jewish sect and Essene bread was made with sprouted grain:
Let the angels of God prepare your bread. Moisten your wheat, that the angels of water may enter it…. And leave it from morning to evening beneath the sun, that the angel of sunshine may descend upon it. And the blessings of the three angels will soon make the germ of life to sprout in your wheat. Then crush your grain, and make thin wafers, as did your forefathers when they departed out of Egypt, the house of bondage. Put them back again beneath the sun from its appearing, and when it is risen to its highest in the heavens, turn them over on the other side that they may be embraced there also by the angel of sunshine, and leave them there until the sun sets.
Szekely, The Essene Gospel Of Peace Book 1, British Columbia: International Biogenic Society, c. 1981, p. 37.
The Reverend Sylvester Graham, regarded as a founder of the American raw foods movement, extolled the virtues of this kind of unleavened, warm-air-baked bread back in the early 1800s:
This kind of unleavened bread, undoubtedly constituted a very important, if not the principal article of artificially prepared food in the diet of the primitive inhabitants of the earth, for many centuries….[F]rom all that has come down to us from ancient times, we learn that primitive generations of every nation subsisted on fruits and other products of the vegetable kingdom, in their uncooked or natural state.
…
If we contemplate the human constitution in its highest and best condition, – in the possession of its most vigorous and unimpaired powers – and ask, what must be the character of our bread in order to preserve that constitution in that condition? the answer most indubitably is, that the coarse unleavened bread of early times, when of proper age, was one of the least removes from the natural state of food, – one of the simplest and most wholesome forms of artificial preparations, and best adapted to fulfil the laws of constitution….
Graham, Sylvester, A Treatise On Bread: And Bread-Making, Boston: Light & Stearns, c. 1837, pp. 11-12, 27-28.

Native Americans made a dehydrated food called pemmican, a mixture of powdered meat jerky and dried berries, bound in a matrix of solid fat. Pemmican protected the jerky against moisture and mold. It could keep for decades and was often carried on long trips due to the high degree of preservation and nutritional density. McHugh, Tom, The Time Of The Buffalo, New York: Alfred A. Knopf, c. 1972, pp. 89-90.
Pemmican was described in an 1804 entry in the Journals Of Lewis And Clark. The explorers were guests of the Lakota people in the area of what is now South Dakota:
After a smoke had taken place, and a short harangue to his people, we were requested to take the meal, and they put before us the dog which they had been cooking, and pemmican, and ground potato in several platters. Pemmican is buffalo meat dried or jerked, pounded, and mixed with grease, raw. Dog, Sioux think great dish, used on festivals. Ate little of dog–pemmican and potato good.
Lewis, Meriwether & Clark, William, Journals Of Lewis And Clark, New York: Signet Classic, c. 1814, r. 2002, p. 73.
2. THE EQUIPMENT


Of the ovens I’ve tried, the most efficient, effective and versatile for LTB is a convection oven. Convection ovens slow bake, steam bake (with the addition of a water tray) and dehydrate. A microwave dehydrates poorly. Infrared ovens can overheat food. Combi ovens (with convection and steam features) cost more money. Digital convection ovens routinely sell for less than $100 US.
A regular oven (wall or countertop) will do fine for LTB, if the thermostat can be adjusted for stable low temperature operation (many such ovens have trouble stabilizing at 250°F/121°C or lower). At the other end of the sophistication spectrum, passive solar ovens, powered only by the rays of the sun shining down on them, have no trouble making 250°F/121°C, even in the dead of winter. My favorite LTB oven, however, continues to be a slow cooker with external temperature control: very affordable, very versatile, very reliable and very green. An alternative to slow cooker ovens, the electric roaster, is set-and-forget, if the thermostat keeps temperature accurately.
For conventional steaming, stainless steel steamers with the width to accommodate full-size cake pans are higher-end or specialty items these days. My hefty, 9.5-inch inside diameter, 3-piece stainless steamer set was just $25 on closeout. Two-tier bamboo steamers up to 14″ in diameter sell for less than $20 (put these over a saucepan of boiling water and cover with a lid). My 7.5-inch stainless steel steamer insert cost me $4 US at a close out store, and fit perfectly in a 2.5-quart saucepot I already owned (the lid fit the steamer too). This smaller insert has the extra height to fit a bundt pan with room to spare.
I see dehydrators sold in most department stores, selling for around $20-$40 US. The cheaper ones don’t have thermostats, but some will accept a slow cooker temperature control. I’ve seen plans for homemade dehydrators powered by the sun, a room heater, terrarium heater and even a hair dryer. Here’s a project to convert a small slow-cooker into a multi-tiered dehydrator: Presto Chango: Turn A Slow Cooker Into A Dehydrator. Any dry=heat oven with the door propped open a crack can be a no-cost dehydrator solution, if the oven will operate stably with thermostat turned so far down (around 115°F/46°C for raw-food quality drying).
3. All About LTB Baking With A Slow Cooker

I have read reviews of slow cookers that heat up so fast, they boil water within an hour. They are fine for baking if tempered with an external temperature control. For manually adjusted heat, these cookers may run too hot for LTB, because one will be constantly scrambling to turn the heat up or down to maintain a steady temperature. My cookers, half full of water and set on HIGH for several hours, don’t boil water.
When buying cookers, check the display models for power consumption. This number has a “W” at the end (for “Watts”) and is found near the AC cord exit on the appliance next to the voltage spec. If the number is too high, it could indicate an fast-heating cooker. On the bottom of my 1.5-quart cooker, it reads 120V @ 120W. On my 5.5-quart cooker, it reads 120V @280W. By comparison, toaster ovens and countertop ovens are rated between 1200W and 2000W.
Slow cookers are cheap. The large ones aren’t expensive either. A basic 6-quart model can cost as little as $25 US (my 5.5-quart cooker with digital timer was $26 on sale and my standard 5-quart cost just $20). I recommend getting two: a small one and a big one. The small one should be round and is ideal for baking small quantities of food, for turning into a dehydrator and as a heat source for rising bread dough. My 1.5-quart cooker cost me $6 US. The large one could be either round or oval. I like the oval crocks for full-size loaves of bread and small cakes. My 5-quart round will hold an 8-inch cake pan with room to spare for a thermometer. A large cooker can bake larger quantities of food, not only because the crock is larger, but also because the heating element is more powerful.

For accurate baking, a thermostat is necessity. Basic slow cookers (the kind with single-knob heat selector, not digital) can be upgraded with an add-on temperature control, the same kind of accessory sold for home sous-vide setups. Add-on controls can cost as little as $10 for a DIY solution to as much as $200. The gray box in the picture above is an example of a homemade control.

Thermometers
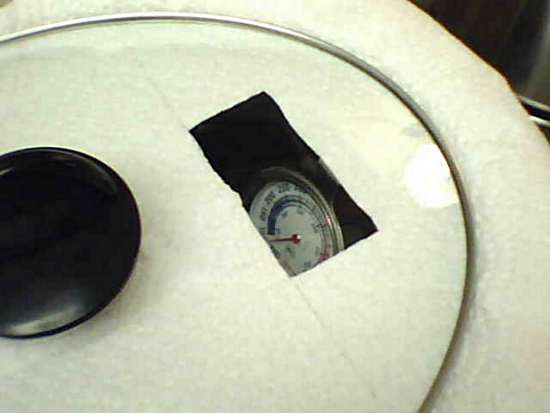
Thermometers are essential for checking food and oven temperatures. The discount store analog oven thermometers (around $5 US) I’ve tried all work well and accurately at low temperatures. Don’t allow them to touch the bottom and walls of the crock, which are hotter than the air inside the crock and will give misleading readings. I put an oven thermometer on a trivet (see picture below) or make a stand for it from craft wire. Similarly, a temperature probe should be protected by a wire coil sheath that dissipates heat buildup.

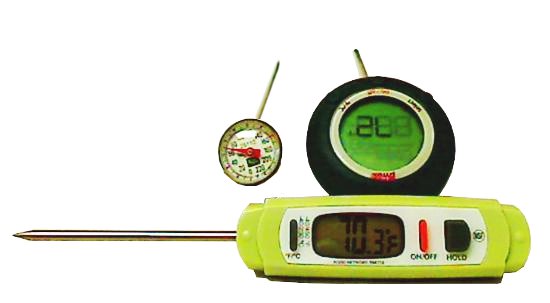
To measure food temperatures, analog and digital instant-read thermometers sell for as little as $6, but the costlier digital thermometers have the advantage of faster and more accurate read times. Test the accuracy of a new thermometer by dipping it in boiling water, IF the boiling point of water at that location is known. At sea level, water boils at 212°F/100°C, but at higher elevations, water boils at lower temperatures. Test the low end of the scale by dipping it in ice water. It should read 32°F/0°C.
Note 1: instant-read thermometers have a probe for inserting into food. The heat sensor in the probe must contact the food to get an accurate reading. In an analog thermometer, the sensor is about 1.5 inches up from the tip of the probe. In a digital thermometer, the sensor is at or very near the tip of the probe, and is more appropriate for testing low-rise cakes and cookies.
Note 2: if the thermometer has a slow response, pre-heat the probe by inserting it in the food for a few seconds before turning it on.

Pre-Heating A Slow-Cooker Oven
In many recipes, the slow cooker must be preheated. Monitor the temperature with an oven thermometer. The thermometer should be on a stand or trivet and not touch the crock, which will be hotter than the air inside. Position the oven thermometer so it won’t interfere with the placement of the food, but the dial is still visible.
With a small cooker, if there’s no room for an in-oven thermometer, a remote probe hanging on the edge of the crock will work too. The probe should be protected with a metal coil to dissipate any hot spots and suspend it from touching the crock. The lid can hold the probe in place. Put a towel around the lid to block gaps that leak heat or use a slow cooker draft stop.
If the cooker has an external temperature control, follow the control’s instructions for pre-heating. Otherwise, turn the cooker to HIGH and heat until it reaches the target temperature. Then turn down to WARM or LOW to steady the temperature. An empty slow cooker can take over an hour to reach 250°F/121°C. If it must be baked as soon as it’s ready, wait until the cooker is near or at pre-heat temperature before preparing the dough or batter.

Adjusting Slow Cooker Temperature
If the cooker has an external temperature control, follow the control’s instructions for maintaining temperature.
Slow cookers heat up slowly, so check the temperature periodically. To read an analog oven thermometer when there are moisture-absorbing paper towels under the cooker’s lid, cut or tear a small hole in the towels so the thermometer will be visible through the glass lid (see picture above). The basic slow cooker only has 3 settings: WARM, LOW and HIGH. Once the cooker attains a target temperature, shift back and forth among these settings to steady the temperature. If the temperature is already too high, either turn off the cooker or angle lid to vent heat.
Trivets
When baking in a cooker, a pan should not sit on the bottom of the crock, which can get so hot that it scorches foods. Lay a pan rest or trivet made by rolling aluminum foil into a “Z” or zig-zag or wavy shape on the bottom of the cooker first.


In the above picture, a system of two trivets maximizes the usable space in a 5-quart cooker to bake 6 muffins. The bottom of the cooker’s crock has been laid with a spiral of aluminum foil roll to support 5 muffin cups. At the center is a small metal condiment to hold up the 6th muffin cup.
Prevent Condensation Drips
Slow cookers are not leak-proof. Steam does escape the crock during baking, but also builds up under the lid and can drip back onto the food. A few layers of paper towels under the cooker’s lid will absorb moisture and hold back any condensation that forms on the lid. To see into the crock (for example, for checking a thermometer), cut a hole in the paper towels.
BAKING TIPS
Browning
Foods that are slow baked or steam baked can brown, but not as intensely. From a chemical perspective, browning is the result of Maillard reactions, enzymatic reactions and the caramelization of sugars. Of these, caramelization is the primary source of browning in baking below 250°F/121°C. Fructose, for example, caramelizes at 230°F/120°C, but glucose and maltose do so at over 320°F/160°C. In general, bread browns at 221°F to 239°F (105°C to 115°C)2, and meat browns at around 302°F/150°C.


Because slow cookers heat only from below, they bake cooler near the top than at the bottom, where the heating coil radiates. Breads may not brown at all at the top, while they burn at the bottom and dry out at the sides. It helps browning and moisture retention to seal the top of the bread pan with perforated aluminum foil before the last rise. The dough rises against the foil, which concentrates the heat and lightly browns the surface. The perforations let steam escape slowly for a light and fluffy texture, not dried out or coarse.
1 Burton, Norah, Concern Regarding Acrylamide In Food, March 20, 2010;
Goldberg, T. (et al.) Advanced Glycoxidation End Products In Commonly Consumed Foods, J Am Diet Assoc. 2004 Aug;104(8):1287-91;
Acrylamide In Foods, MedicineNet.com, 2005.
2 Browning, Food-Info.net (Wageningen University, The Netherlands).
O’Connor, Anahad, Rosemary Helps Reduce Toxins in Grilled Meat, New York Times, May 31, 2010.
Purlis, E., Salvadon, V., Bread Browning Kinetics During Baking, Jrnl of Food Engineering, June 2007.


You must be logged in to post a comment.