
[ Equipment: 7-inch springform pan or removable bottom cake pan, oven or slow cooker with temperature control. For more information about the terminology in this recipe, see Low Temperature Baking: A Journey of 3 Paths ].
The majority of coffee-flavored cake recipes list instant coffee crystals or powder as the main flavoring agent. I’ve never liked the processed taste of instant coffee, and LTB cakes don’t obscure the nuances of their ingredients. For my version, the instant coffee has been replaced with a brewed coffee extract and finely ground coffee (unbrewed espresso), amped up with a hint of cocoa. To give the cake a bit of complexity, I searched online for spiced coffees and found two ginger coffees: the Indonesian Kopi Jahe brewed from Java Arabica beans and the Yemeni Qishr, traditionally more like a tea infusion of dried coffee berries (cascara), although it can be based on one of their Moka coffees. Ginger dominates in both, but recipes for Qishr may feature a medley of spices, like the blend of ginger and nutmeg here.
This cake recipe has been gestating for several weeks, because I’ve been testing new LTB ideas and techniques along with the basic recipe: baking-soda-only leavening, low-carb flours, new constructed ingredients. This recipe marks my switchover to baking soda as the primary leavener in baked goods other than breads. In my experience, LTB ovens don’t seem to generate the high heat necessary to fully activate baking powder, and baked goods don’t rise as high as they should. Baking soda has been producing consistently superior results in my tests of cakes and muffins. However, I’m not throwing away my baking powder. There are times when a recipe requires a heat-activated leavener or the time-to-oven lags and the baking soda reaction would fizzle out.
Baking soda reacts without heat but does need an acidic batter to effervesce bubbles. In this recipe, cultured buttermilk and lemon juice are the main sources of acid. To substitute for the 1/4 cup of buttermilk, try mixing 1/2 tablespoon of lemon juice and 1/4 cup of milk. That’s more lemon juice than the standard substitute. I culture my own buttermilk and like it extra sour. A homemade, long-fermentation (more than 12 hours) yogurt should also work.
For the low-carb cake, the recipe specifies 3/4 teaspoon of baking soda. The additional quarter teaspoon compensates for the ground flax seed, a volume substitute for the sugar, which bulks up and gains weight as it absorbs water (see the discussion of sugar substitution below). With the 3/4 teaspoon of baking soda, the cake should rise to about 1-1/4 inches. If it doesn’t make it that high, try increasing the baking soda to 1 teaspoon (add another teaspoon or so of lemon juice if the additional soda makes the cake taste soapy).
After gluten-free baking, low-carb baking has been a hot food topic for weight loss and healthier eating. The key ingredient in low-carb baking is low-carb flour. Naturally low-carb flours like oat flour, almond meal, coconut flour or flaxseed meal fail as a replacement for all-purpose flour for a variety of reasons (texture, taste, density), hence the proliferation of commercial low-carb flour blends. Because none of the markets near me sell those baking mixes, I make my own. I began with an Atkins Diet baking mix clone I found on the net, and despite trials of different ratios of protein and flour, it made cakes with a texture and taste like a sponge dipped in soy milk. I moved on to formulating my own mix from studying the nutrition panels on 3 popular commercial baking mixes (Atkins Cuisine, Bob’s Red Mill and CarbQuik).
For this recipe, the low-carb flour is a blend of soy flour, wheat gluten and oat flour (SGO flour) in a 1:1:1 ratio. These 3 ingredients frequently appear in the commercial mixes and are available at my local markets. To diminish the beany aftertaste of the soy flour (a common complaint), I toast it in the microwave. In a finished cake, there is a strong taste of oats, however, which, if objectionable, might be lessened by substituting wheat bran or oat bran for some or all of the oat flour. Notwithstanding, I count this flour blend as a great success with a soft crumb and nice rise. Soy flour blends can bake a little faster than regular flour, but in this recipe, the 2 cakes track closely in oven time, although the low-carb comes out with a darker crust. A cup of the blend has a carb count of 34 grams (8 grams of fiber) and 480 calories, very comparable to the commercial mixes.
After the flour, the second huge source of carbohydrates in pastries generally is sugar. For the low-carb version of the ginger coffee cake, I replace the sugar in the cake and topping with a blend of aspartame and stevia. I happened to have these low-cal sweeteners in my food bin, and think they work well together. To my taste buds, stevia lacks the intense top notes of regular sugar, whereas aspartame has the top notes, but not the full body of sugar. They are low bulk sweeteners, and to compensate for volume of regular sugar, I add half as much ground flax seed – only half because flax seed expresses strong hygroscopic and mucilaginous properties.
Aspartame breaks down when heated, perhaps even under LTB temperatures. I read in the Wikipedia that it can be stabilized by encasing it in fat, so I mix it in oil or butter before adding it to the batter. I can’t say how well this technique protects the aspartame from heating because some of the oiled aspartame dissolves when mixed with liquid, but I can say that I can taste the sweetness in the cake. The recipe specifies packets of the sweeteners. Each packets of aspartame or stevia is equivalent to 2 teaspoons of sugar for a total equivalence of 16 teaspoons of regular sugar. That’s more sweetener than needed to replace 1/4 cup of regular sugar, but suits my taste preference.
I’ve made these cakes with up to a tablespoon of powdered ginger to obtain a strong ginger taste, but the final recipe reduces that by half, because I think the nutmeg really amps up the ginger flavor, punctuated by bursts of ginger from the ginger chips. Ginger chips are nothing more than chopped candied ginger, packaged for commercial sale. I don’t have them in the low-carb cake, because two tablespoons contain 24 grams of carbohydrates. For the low-carb cake, I substitute ginger-pressed raisins, a constructed ingredient, at 15 grams of carbohydrates. That’s still a significant source of carbs, but it’s spread out over the entire cake, and the pressing technique concentrates the ginger flavor in sweet nuggets without the mess of cooking in a syrup.
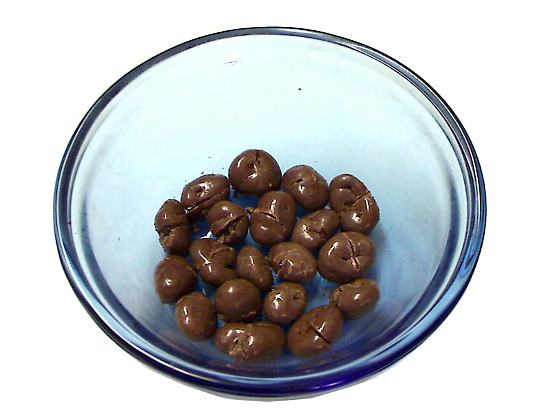
The other constructed ingredient in this recipe is the coffee-filled chocolate raisins. I had intended to decorate the top of the cake by strewing small chocolate coffee beans (such as the Koppers Mini Mocha Coffee Beans) over the topping. Regular-size chocolate coffee beans clash with the scale of the cake. However, no markets near me sell the mini beans, so I substituted with homemade coffee-filled chocolate raisins, very tasty and not much more effort to make than the ginger-pressed raisins. In the low-carb cake, I omit the chocolate raisins and, the ginger-pressed raisins could be omitted too, if desired.
Two ingredients comprise the coffee flavoring: brewed coffee extract and coffee bean powder. The extract colors and flavors the batter; the coffee bean powder boosts the extract’s flavor. I made the extract with a canned medium roast coffee (Folgers Special Roast, but any brand should work). I think the darker roasts impart more flavors to the extract. The coffee bean powder is the same canned coffee but very fine ground (espresso or finer) in a coffee or spice grinder (it must be ground to a fine powder or it will turn the cake gritty). A tiny bit of cocoa powder highlights the mocha notes in the coffee.
Note: I’ve listed the ingredients for the low-carb cake in parentheses. Several steps in the cake method show pictures of the low-carb batter or the finished cake.
Makes 8 servings
– 210/180 (low carb) calories per serving
– 31g-1g/10g-3g (low carb) carbohydrates-fiber per serving
– Oven Temperature: 250°F/121°C
Cake:
- 1 cup all-purpose flour (low carb: 1 cup SGO flour, see below and see text)
- 1/4 cup sugar (low carb: 4 packets aspartame + 4 packets stevia + 1/8 cup ground flax seed – see text)
- 1/2 teaspoon baking soda (low carb: 3/4 teaspoon baking soda – see text)
- 1/2 teaspoon finely ground coffee powder (not instant coffee, see text)
- 1/8 teaspoon cocoa
- 1-1/2 teaspoon powdered ginger (see text)
- 1 teaspoon nutmeg (see text)
- 2 tablespoons beaten egg
- 2 tablespoons vegetable oil
- 1/4 cup coffee extract (see text)
- 1/4 cup cultured buttermilk
- 1/2 tablespoon lemon juice (low carb: 1 tablespoon lemon juice)
- 2 tablespoons ginger chips 180/24g (low carb: 2 tablespoons ginger-pressed raisins, see text and see below)
- 2 tablespoons mini chocolate coffee beans or coffee-filled chocolate raisins, optional, see text and see below (low carb: omit this ingredient)
Streusel Topping:
- 1/4 cup rolled oats, chopped
- 1/8 cup baker’s coconut, chopped (low carb: 1/8 cup unsweetened shredded coconut, chopped)
- 1/8 cup all-purpose flour (low carb: 1/8 cup GSO flour)
- 1/8 cup sugar (low carb: 2 packets aspartame plus 2 packets stevia plus 1 tablespoon ground flax seed – see text)
- 1/4 teaspoon powdered ginger
- 1/4 teaspoon nutmeg
- pinch of salt
- 1-1/2 tablespoon butter (low carb: 4 teaspoons butter)
SGO (Soy-Wheat Gluten-Oats) Flour (makes 1-1/2 cups):
- 1/2 cup soy flour (will be toasted)
- 1/2 cup oat flour
- 1/2 cup wheat gluten
Coffee Extract (makes about 1/4 cup):
- 2 tablespoons ground coffee
- 1/2 cup boiling water
Ginger-Pressed Raisins (makes 1/8 cup):
- 2 tablespoons raisins (see text)
- 1/2 teaspoon powdered ginger
Coffee-Filled Chocolate Raisins (makes 1/8 cup):
- 2 tablespoons chocolate covered raisins (see text)
- 1/2 teaspoon coffee bean powder or unbrewed espresso coffee
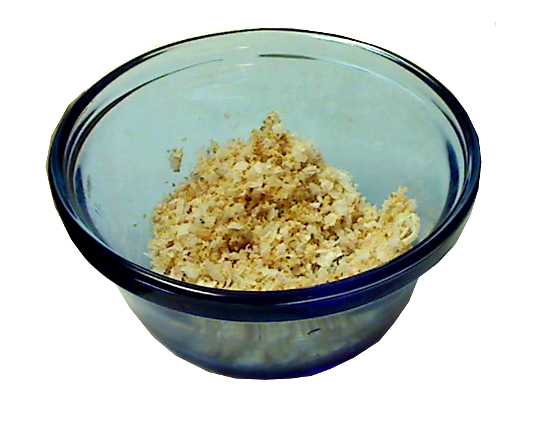
Method: Low-Carb Soy-Gluten-Oat Flour

1. Pour the soy flour into a heatproof bowl. Place bowl in microwave and heat on HIGH power for 30 seconds. Remove and stir flour. Repeat heat and stir procedure until the bitter aftertaste has been softened (4 minutes in an 800W microwave). Taste a tiny amount of the flour after each stirring. Do not overprocess.

2. The heating lightly toasts the flour and improves the flavor. In the above picture, the toasted soy flour on the right is a shade darker than the untoasted soy flour on the left.

3. In a large bowl, measure out the toasted soy flour, oat flour and wheat gluten.

4. Whisk the flours until well combined. Optional: sift the flour to break up any small lumps or clumps.

5. Store in an airtight container.
Method: Ginger-Pressed Raisins

1. Roughly chop raisins, each one being cut into halves or thirds, and put in a small dish. The pressing technique works best with more raisin flesh exposed.

2. Sprinkle dried ginger over the raisins and mix to coat. Then with the back of a spoon, press the ginger into the raisins until all of the loose ginger has been adhered or absorbed.

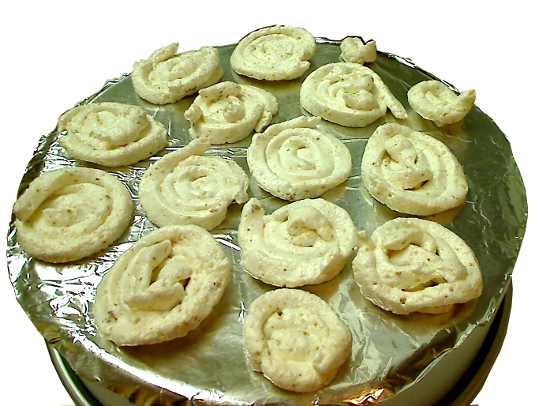
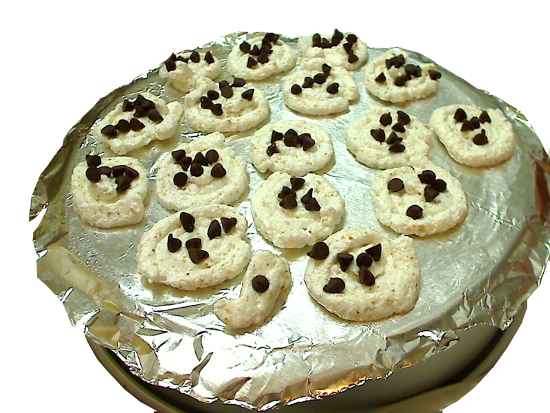
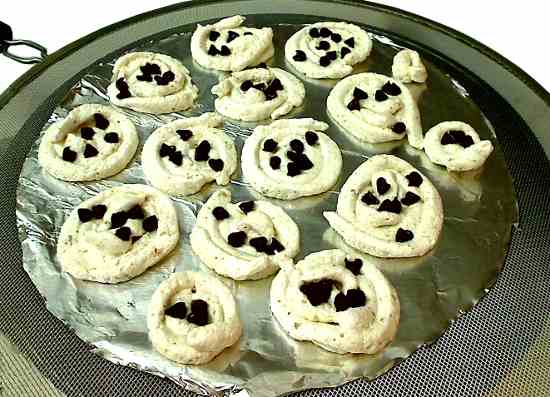
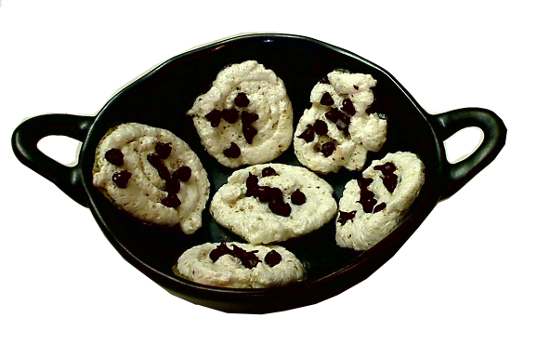
Method: Coffee-Filled Chocolate Raisins

1. With a sharp paring knife, cut each raisin candy about 2/3 of the way through.

2. GENTLY open the candy raisin just enough to expose the inner flesh.

3. With a thin spatula or a small blunt knife, scoop a pinch of the coffee powder into the candy raisin and press close. Work quickly because the heat from the hands will melt the chocolate.

Method: Coffee Extract

1. Put the ground coffee in a small bowl and pour in boiling water. Cover and allow to brew for at least 1 hour.

2. Strain coffee mixture and discard grounds.

Method: Topping

1. In a large bowl, combine the dry ingredients. Add the butter cut into small chunks.

2. Cut in the butter with a pastry blender or fork or rub the mixture between the hands until the dry ingredients have been evenly coated.

3. Cover and store in the refrigerator until ready to use.
Method: Cake

1. Pre-heat the oven to 250°F/121°C.
Grease a 7-inch springform pan or cake pan with removable bottom. Cut out a 7-inch diameter circle from wax paper or parchment paper and place in bottom of pan. Grease the top of the paper. Low carb cake only: The low-carb batter sticks more, so I recommend flouring the pan with oat flour for easier unmolding later.

2. In a large bowl, whisk the the dry ingredients together. Low carb cake only: Include the stevia packets, but leave out the aspartame sweetener.

3. Pour the vegetable oil into a small dish. Low-carb cake only: Thoroughly mix in the aspartame powder and make sure to break up any lumps or clumps.

4. Mix in the remaining wet ingredients.

5. Pour wet ingredients into the flour mixture and stir to form a thick batter. Do not overmix. The baking soda reaction begins immediately, so work quickly from here on and try not to deflate the batter.

6. Add ginger ships, chopped candied ginger or ginger-pressed raisins. Stir 2 or 3 times to incorporate.
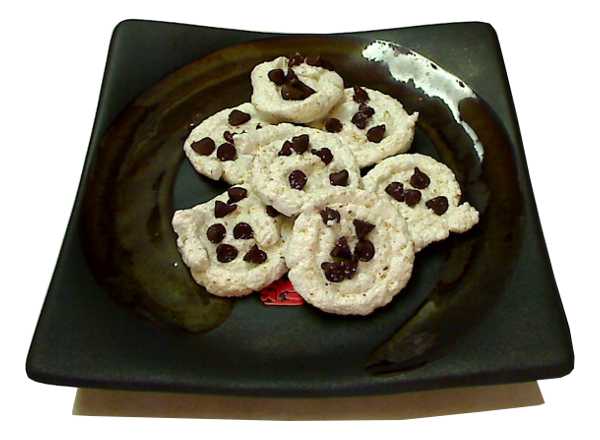
Note: Steps 6 to 12 have pictures of both the original and low-carb cakes. The original cake displays above the low-carb version.


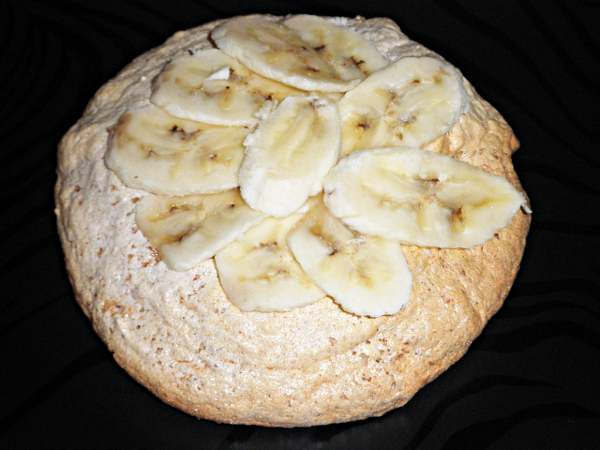
7. Pour the batter into pan and if necessary, spread the batter with a spatula or back of a spoon to evenly distribute.


8. Sprinkle and/or crumble the topping over the batter.

9. Sprinkle optional mini chocolate coffee beans or coffee-filled chocolate raisins over the topping.

10. Cover the top of the pan with a sheet of aluminum foil and secure by tying it around the rim with string. With a knife or scissors, cut out a 2-inch hole in the center of the foil. Then, with a 1/8-inch wood skewer, punch 12 holes, evenly spaced, about half way between the rim and the center hole.


11. Bake at 250°F/121°C for 50 to 60 minutes. The cake is ready when a skewer inserted in the center comes out clean. Low-carb cake only: The low-carb batter bakes faster. Begin checking for doneness after 45 minutes.


12. Let cool for 15 to 30 minutes. Unmold and continue cooling on a rack.


13. Slice and serve.


You must be logged in to post a comment.